Before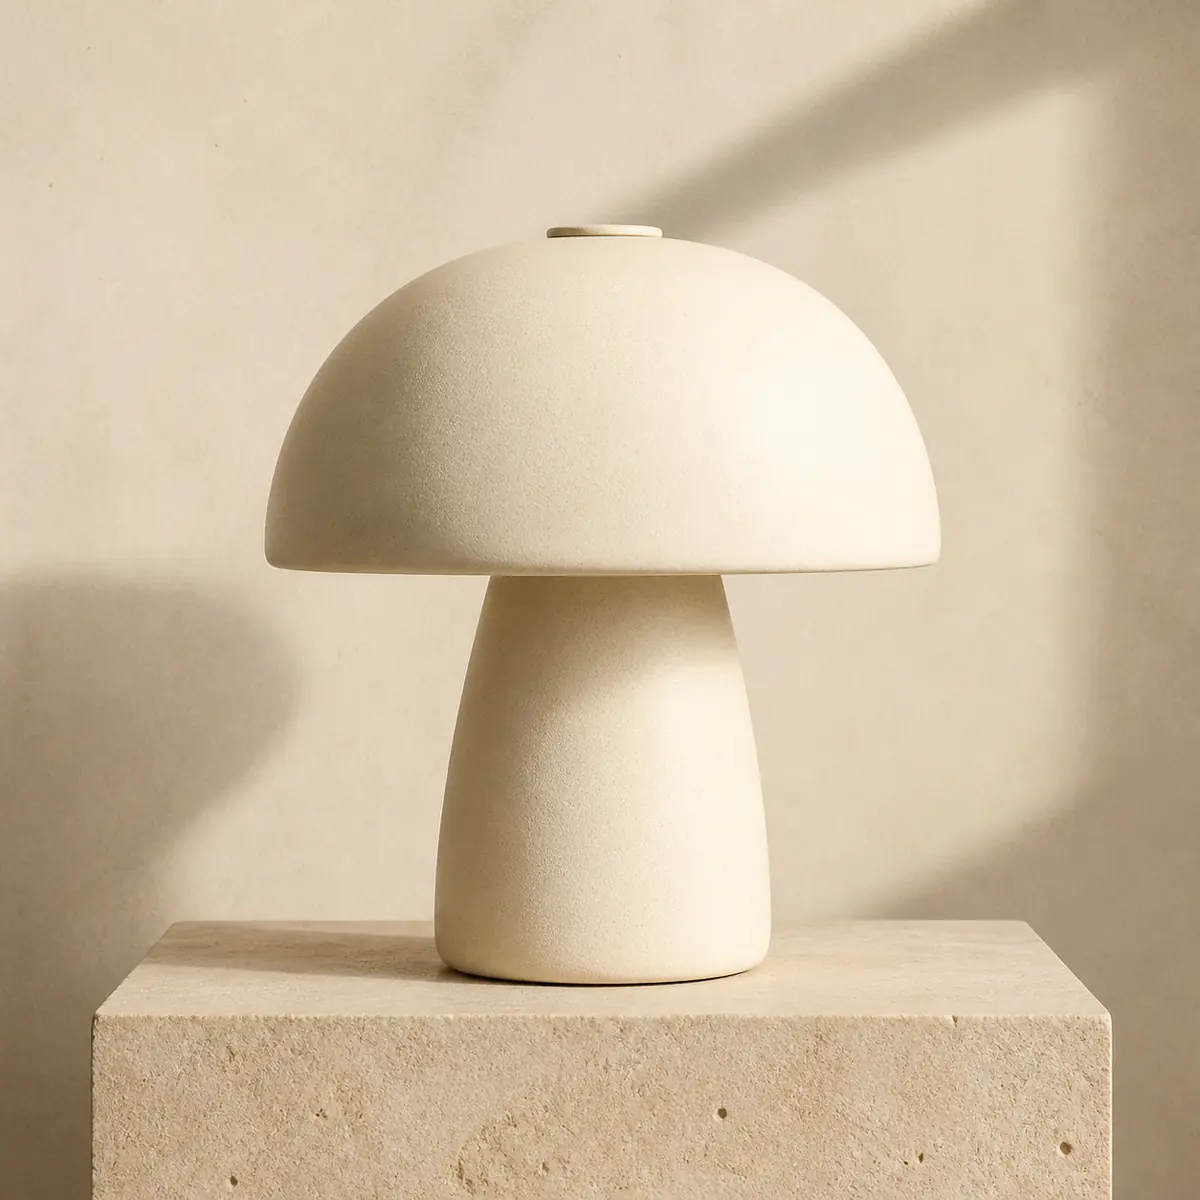
After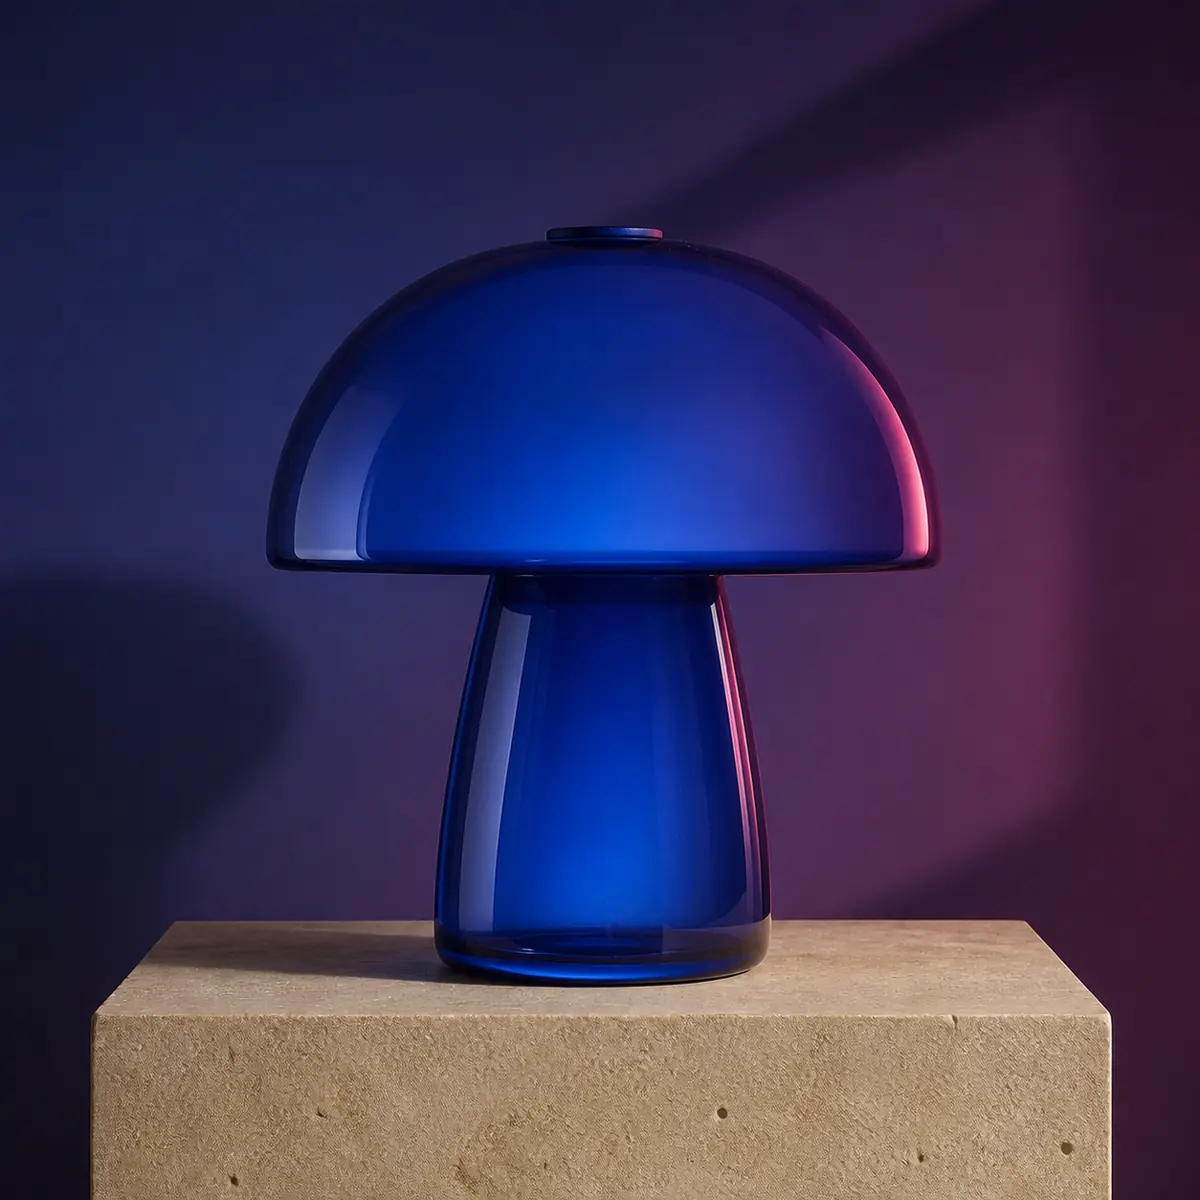
01
Ceramic to cobalt glass
Edit prompt
“Keep the mushroom lamp silhouette and camera position. Change the ivory ceramic to cobalt glass and move the studio into blue-hour light.”
Try image to image AI free with no signup needed. Use the image to image AI generator with a reference image: say what stays and what changes, then vary background, style, material, lighting, composition, subject, pose, or color. Compare results and refine one decision at a time.
Keep the lamp silhouette and camera position. Change the ivory ceramic to cobalt glass and move the studio into blue-hour light.
Original, instruction, result
Each example pairs the reference, edit prompt, and generated result so you can judge the change. Use this prompt-based workflow for background, material, light, color, and style—not as a hidden layer-and-mask tool.
Edit prompt
“Keep the mushroom lamp silhouette and camera position. Change the ivory ceramic to cobalt glass and move the studio into blue-hour light.”
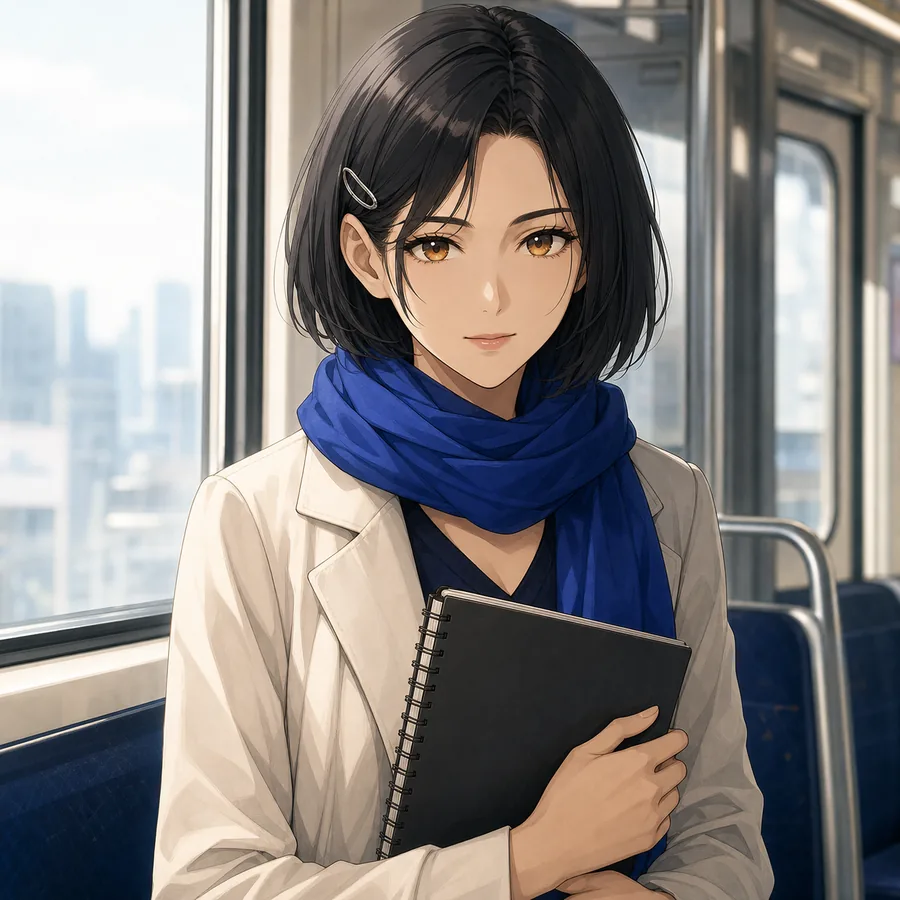
Edit prompt
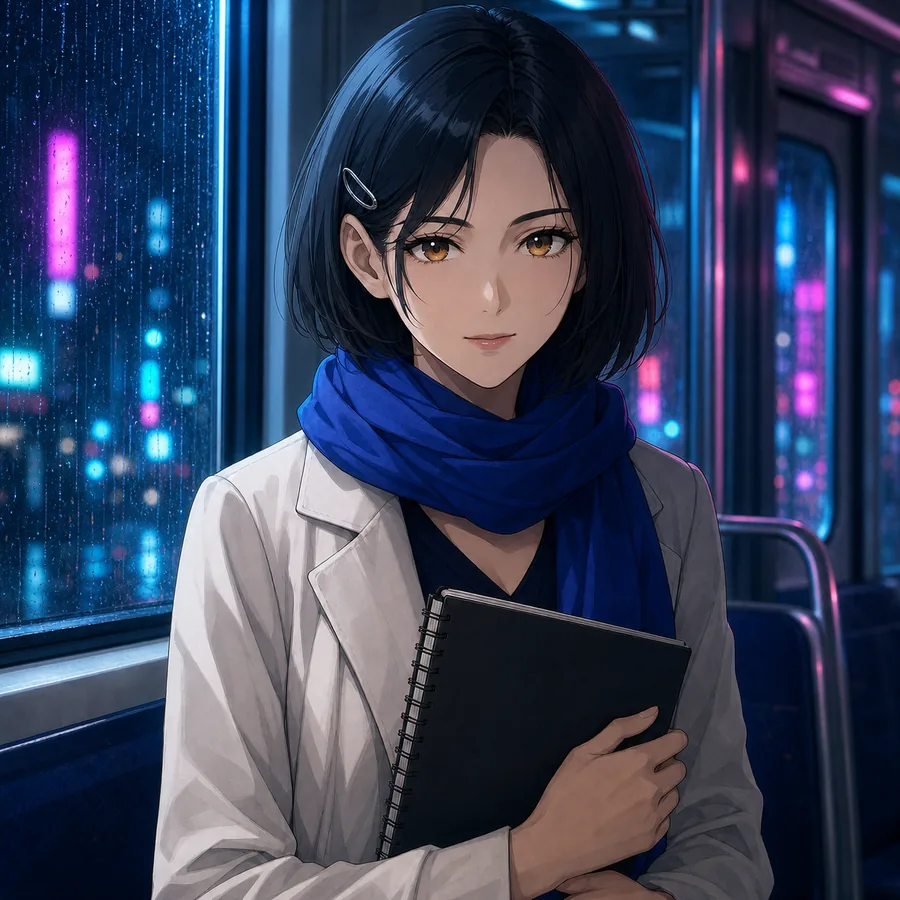
“Keep the same adult anime character, pose, clothing, sketchbook, and framing. Change the daytime train into a rainy neon night with cyan and magenta reflections.”
Edit prompt
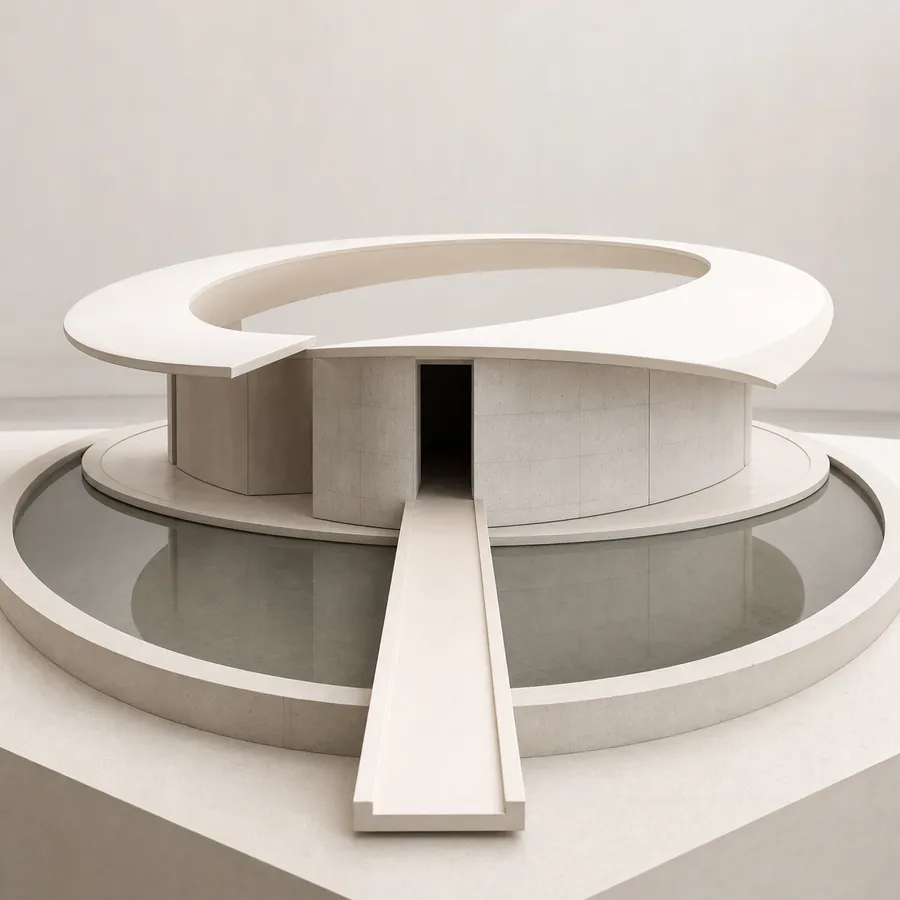
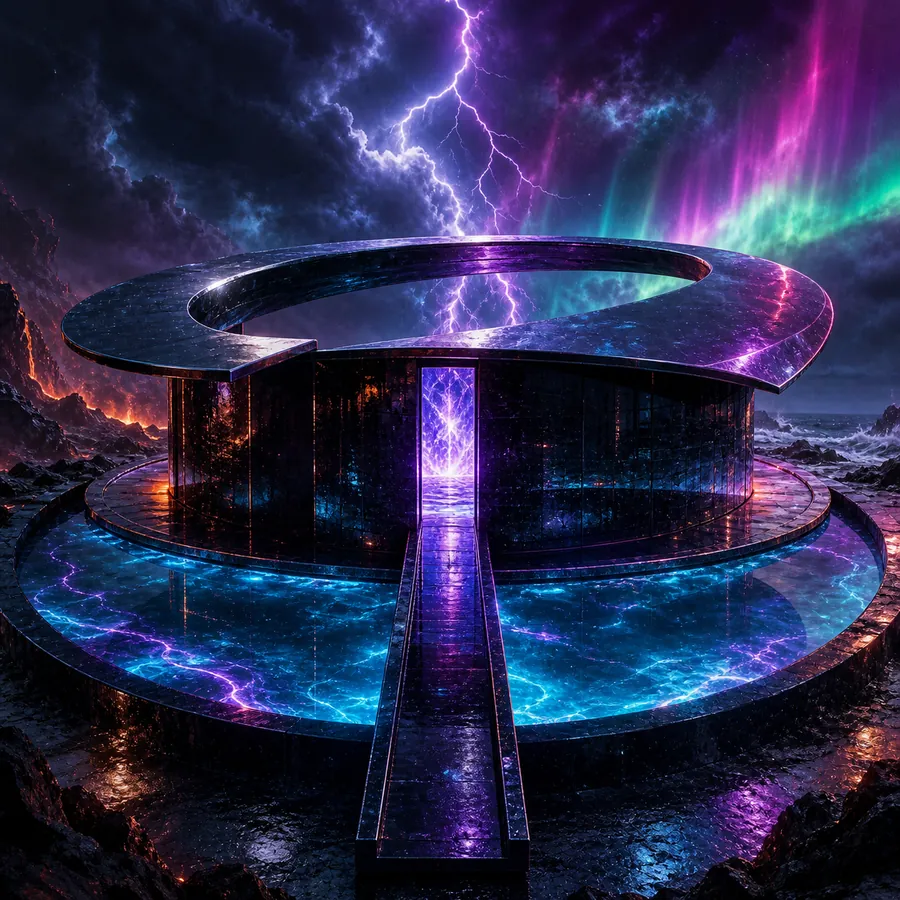
“Keep the pavilion geometry, bridge, basin, and camera angle. Turn the white clay model into an obsidian-and-glass sanctuary on a volcanic coast with a glowing energy core, bioluminescent water, lightning, and aurora.”
Make one visual decision visible
Use the Image Editor when the source already contains something worth carrying forward: a composition, silhouette, product form, or mood. The four tasks below are broad enough for exploration and specific enough to judge. They explain how to edit image direction without promising pixel-perfect retouching.
Move a subject from a plain room into a studio, landscape, seasonal scene, or campaign environment. Describe the new setting and how its light reaches the subject. The AI Image Editor generates a new integrated scene rather than applying a precise cutout.
Turn ceramic into glass, test an unbranded colorway, or compare matte and reflective finishes while the reference supplies the broad shape. Use the Image Editor for concept decisions, then check geometry and real product specifications separately.
Keep the frame and ask for morning window light, a dark studio rim, soft overcast daylight, or a warmer interior. Lighting changes can also alter color and detail, so compare the generated result with the source before selecting a direction.
Use an existing frame as the anchor for editorial photography, paper craft, painted illustration, or a soft 3D interpretation. Name the material, palette, and finish you want; broad labels alone give the AI Image Editor too much room to guess.
Three steps from source to variation
Let the reference carry shape or composition and use the prompt to name one clear change. Start directly in the workspace and compare several results rather than expecting one perfect correction.
Choose a clear source. The uploader shows formats, size guidance, and model-specific image limits. Leave it empty only when you want the workspace to switch to text-to-image instead of an image to image request.
Begin with the anchor: silhouette, camera angle, pose, or layout. Then describe one main change to background, light, color, material, or style. This order helps the Image Editor interpret which parts of the reference matter and which parts can move.
Review the credit estimate, create a small set, and compare full-size results. When one direction is close, reuse the source and settings, simplify the edit image prompt, or change one visual decision. Reuse never runs automatically; you choose when the next batch starts.
Preserve first, transform second
A useful edit image instruction has two halves: the anchor and the change. State what should remain recognizable, then name one main transformation and the visual details that support it. The Image Editor can still vary small features, but a clear division makes every result easier to evaluate.
“Keep the bottle shape, pump, and front camera angle. Move it to a pale travertine studio, add warm morning side light, and preserve the unbranded surface.”
“Preserve the lamp silhouette and centered composition. Change ivory ceramic to translucent cobalt glass with soft blue-hour rim light and a dark studio background.”
“Keep the train position, reader, and rainy city layout. Reinterpret the scene as layered cut paper with indigo, coral, visible fibers, and soft stacked shadows.”
The Image Editor accepts JPG, JPEG, PNG, and WebP references. The selected model determines how many images you can add, the size guidance, available ratios, resolution, and number of results; the workspace displays those limits next to the controls. You can edit image settings before generation and see the estimated credit cost before committing to a new batch.
Signed-in creations keep the source, prompt, settings, and results together. Open one to compare original and result, then choose Reuse Settings. The AI Image Editor restores supported controls and waits for confirmation, so history never starts a paid edit image task.
Small text, logos, hands, exact identity, dimensions, and fine textures may change. The current Image Editor has no local masks, layers, crop tools, lossless restoration, or guaranteed preservation. Use it to edit image style and direction, then finish exact brand, type, or identity work in a dedicated tool.
Know what kind of edit this is
Clear answers about prompts, supported changes, source images, history, and the limits of generated edits.
Image to image AI free means no signup is needed to upload a reference and describe the transformation you want. The generator may preserve broad composition, shape, pose, or color while changing the requested direction. Results are generative, not fixed-pixel edits, and free guest access is not unlimited generation.
To edit image style, write the anchor first: what should remain recognizable from the upload. Then name one main change and add the material, palette, light, or setting that supports it. If results drift, shorten the instruction. If they barely change, make the requested material or visual language more specific.
The Image Editor is suited to background atmosphere, lighting, color, material, and broad visual style. It can also use a source as composition reference. Exact results vary by image and model. The page does not promise local masking, object removal, crop controls, layers, or a precise replacement of one selected pixel region.
No. The source is visual guidance, not a locked template. Small type, logos, faces, hands, product measurements, patterns, and edges can change even when the prompt asks to preserve them. Compare the output with the original, and do not use a generated variation as proof of an exact product or event.
You can ask the AI Image Editor to generate a new setting without drawing a manual selection. Describe the subject that should remain, the new environment, and the light connecting them. The result is a newly interpreted image, not a guaranteed cutout, transparent background, or precise background-removal operation.
Upload a reference for an image-to-image request. If you leave the uploader empty, the workspace sends a text-to-image request instead. The current AI Image Editor accepts JPG, JPEG, PNG, and WebP; size and source-count limits depend on the selected model and appear in the uploader. Choose clear images you are authorized to use.
Yes. For signed-in work, creation details keep the source references with the generated result. You can see the original, reopen supported settings, and return to the same Image Editor with Reuse Settings. Reuse does not submit a new task or spend credits until you explicitly confirm generation.
No. Use it when you want generative variations and a new creative direction. It does not provide layers, brush masks, crop tools, exact typography, guaranteed face identity, lossless restoration, or unlimited enlargement. Finish precise brand, layout, retouching, and compliance work in the appropriate professional application.
Keep the source, change the direction
Choose an image you are allowed to use, state what should stay recognizable, and describe the new style, background, light, color, or material. Start directly in the workspace and compare the generated variations.
Prefer a tested art medium?
Upload one image and choose Watercolor, Ink Wash, Paper Cut, Pixel Art, or Clay 3D without writing a full edit prompt.